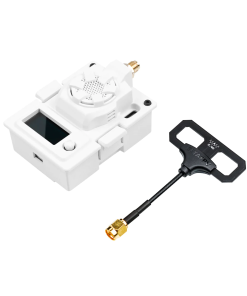
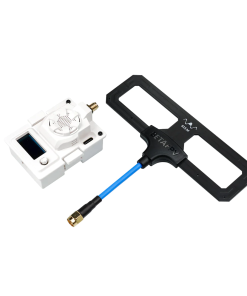
BetaFPV ELRS Micro TX Module
SKU: 01070003_1 2.4GHz50.00 €
BETAFPV Micro RF TX module is based on the ExpressLRS project, an open-source RC link for RC applications. ExpressLRS aims to achieve the best possible link performance in both speeds, latency, and range. This makes ExpressLRS one of the fastest RC links available while still offering long-range performance.
4 in stock
BETAFPV Micro RF TX module is based on the ExpressLRS project, an open-source RC link for RC applications. ExpressLRS aims to achieve the best possible link performance in both speeds, latency, and range. This makes ExpressLRS one of the fastest RC links available while still offering long-range performance.
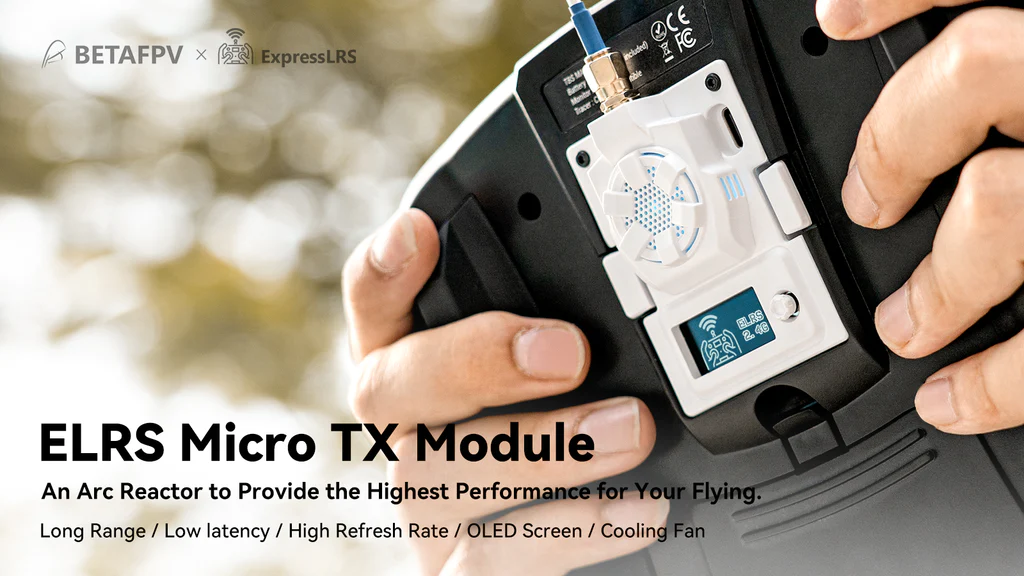
A ton of ExpressLRS items are available now!
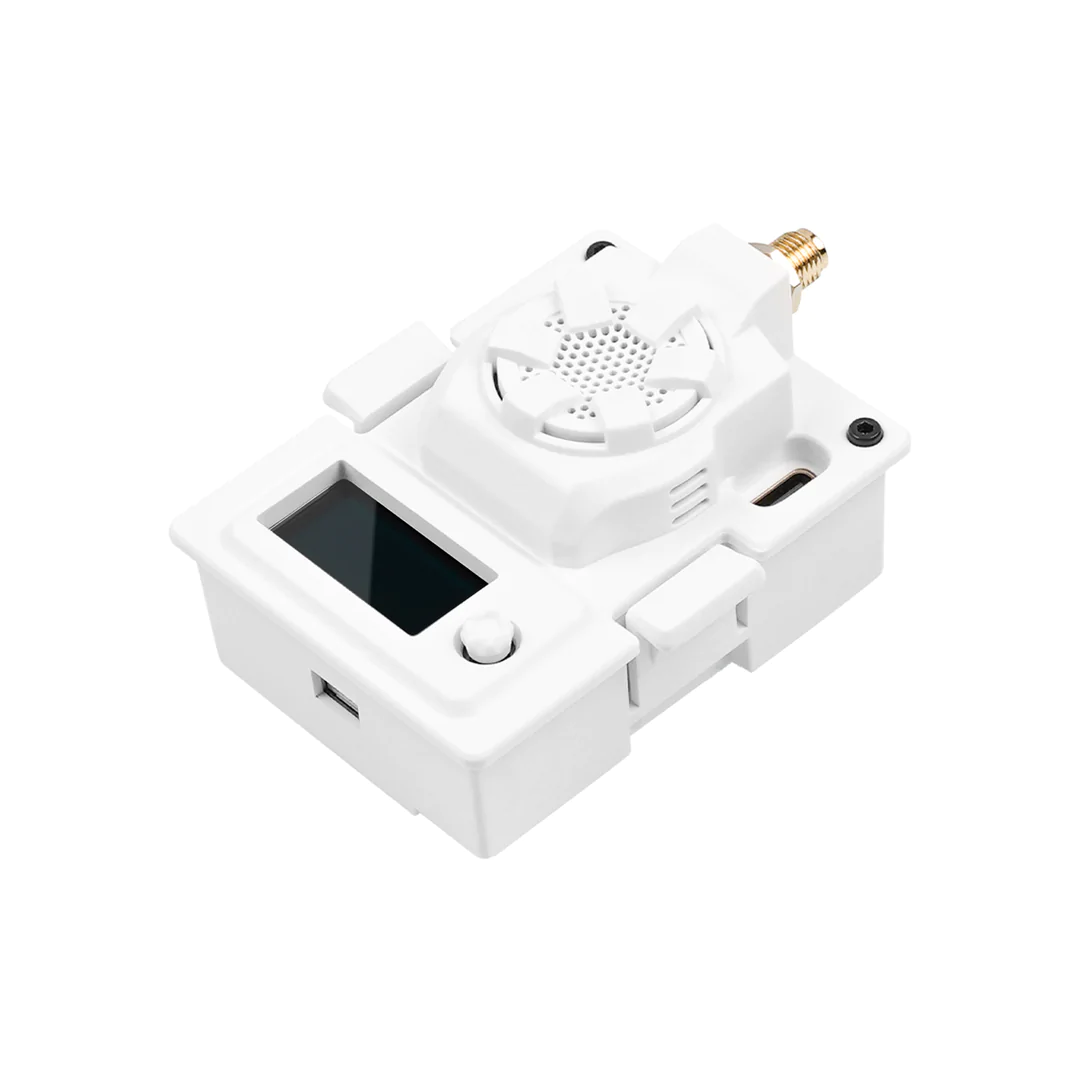
The ELRS Micro TX Module Case and Fan are released now! Upgraded module case with 6.5*13.5mm USB port housing is compatible with most USB Type-C cables. Moreover, there are two colors in the new module case. You can make your own module easily.
Specification
- Item: ELRS Micro TX Module
- Input voltage: 5V~12V
- XT30 port: 5V~12V, recommend 2S(8.4V) battery, DO NOT support 3S(12.6V) or above
- USB port: Type-C
| 2.4GHz 1W | 2.4GHz 500mW | 915/868 MHz 500mW | |
| Packet refresh rate | 50Hz, 150Hz, 250Hz, 500Hz | 50Hz, 150Hz, 250Hz, 500Hz | 25Hz, 50Hz, 100Hz, 200Hz |
| RF output power | 25mW, 50mW, 250mW, 500mW, 1W | 25mW, 50mW, 250mW, 500mW | 100mW, 250mW, 500mW |
| Frequency bands | 2.4GHz ISM | 2.4GHz ISM | 915MHz FCC 868MHz EU |
| Heat sink | Included | Not included | Not included |
| Backpack Function | Support | Not support currently | Not support currently |
ELRS 2.4G 1W Version
The black version with maximum 1W RF output power is released now. Support all 5D button dimensions based on BETAFPV ELRS V2.0.0 firmware. A new backpack function is added, allowing wireless communication between ExpressLRS, and other FPV related devices for command and control, or for querying config.
Note: Please make sure the VRX also supports backpack function when using the module VRX-backpack function. Backpack function will be added to the 500mW version in the future.
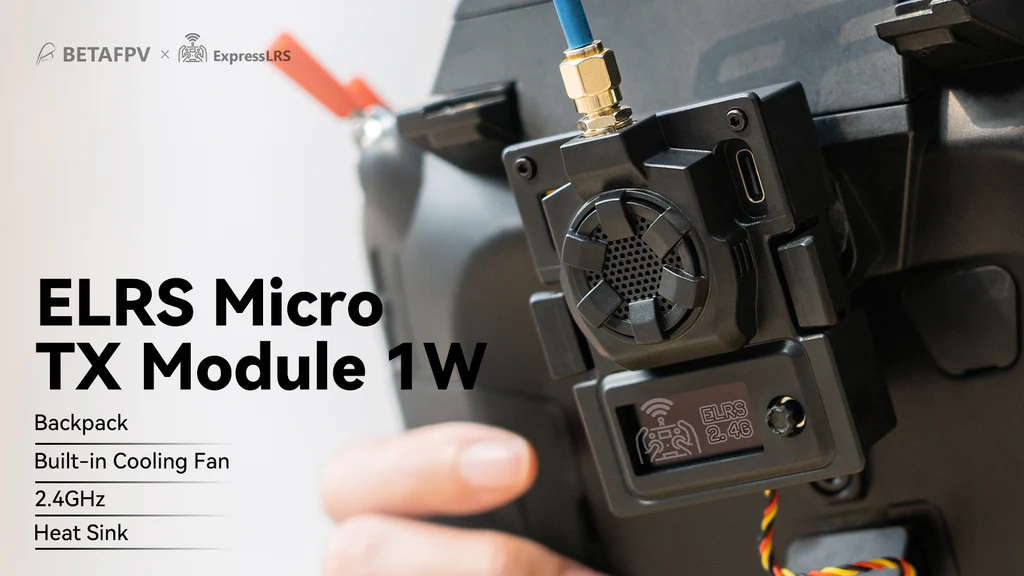
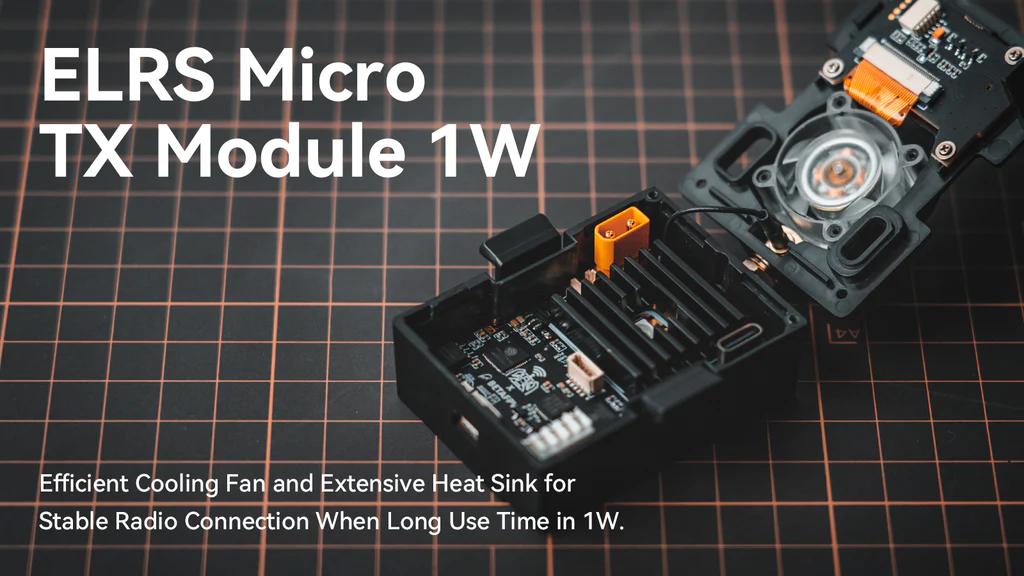
Compared with 500mW versions, it not only builds in a cooling fan but also the heat sink is included, which enhances the performance of cooling. So this module can work properly in daily use and not need to worry about temperature.
Note: About the temperature test, please read the article ELRS Micro Module Temperature.
1W Limited Edition
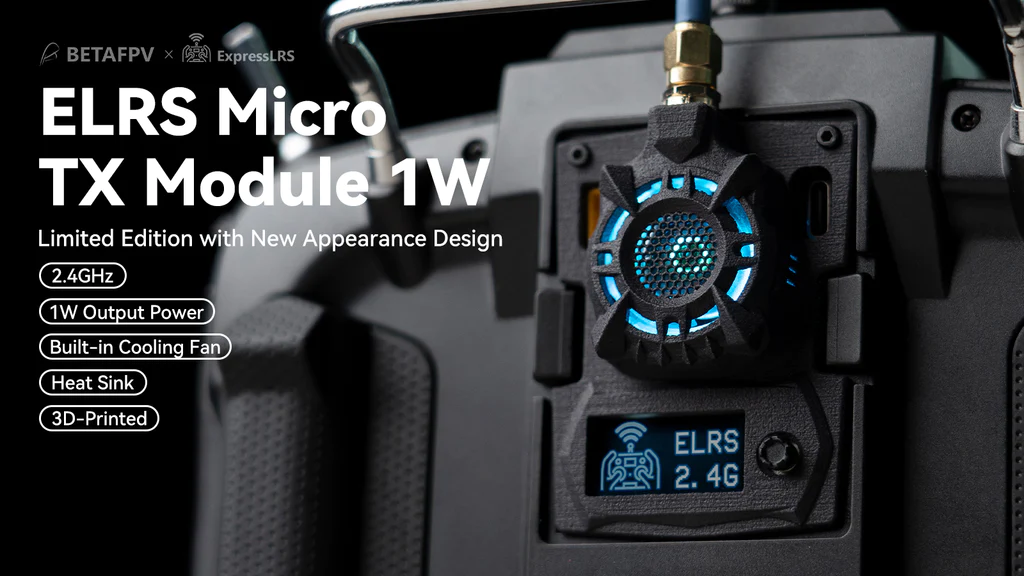
Apart from the classical case for the micro TX module, a limited edition will be released together. Both classical case and limited case versions have the same function. The 3D-printed case with new appearance design makes the module very cool when LED light flashing. Limited stock, first come first serve!
Diagram
BETAFPV Micro RF TX module is compatible with radio transmitter which has the micro module bay (AKA JR/SLIM module bay, e.g. Frsky Taranis X9D, TBS Mambo). Below is the diagram for the 500mW version module.
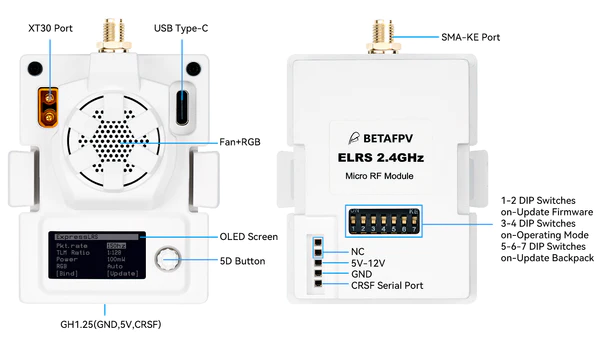
Below is the diagram for ELRS 2.4G 1W version. DIP switches will be added to 500mW versions in the future.
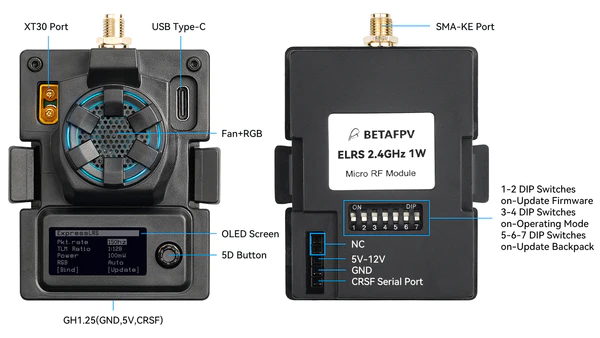
Note: Please assemble the antenna before power on. Otherwise, the PA chip in the Micro TX module will be damaged permanently.
Note: Please DO NOT use 3S or above battery to power up the TX module via XT30 port. Otherwise, the power supply chip in the TX module will be damaged permanently.
Note: Please do not turn on all DIP switches at the same time. You can refer to the chart to know about DIP switches on/off based on different uses.
| 1-2 DIP switches | 3-4 DIP switches | 5-6-7 DIP switches | |
| Update Firmware | ON | OFF | OFF |
| Operating Mode | OFF | ON | OFF |
| Update Backpack | OFF | OFF | ON |
About the Firmware
The ExpressLRS official project on Github does NOT support the OLED function for the moment. BETAFPV team will work with the ELRS team and make the official repository support the OLED and button function ASAP.
BETAFPV Micro TX Module ELRS V2.0.0 firmware is published. The firmware does not include the Binding Phrase. So please make sure the receiver works on officially major release V2.0.0 protocol and no Binding Phrase set.
- Support 5D buttons and the OLED menu with the official ELRS 2.0.0 release.
- The color of the LED changes automatically according to the system status.
- Other new and various features are fully synchronized with the official ELRS 2.0.0.
- When entering OLED menus page with long pressing, the connection between RF TX module and receiver works normally. Please do not change the Pkt Rate, otherwise, you must re-power the receiver.
https://github.com/BETAFPV/ExpressLRS
User manual of How to Flash Firmware of ELRS RX/TX.
You could all use the ELRS official firmware V2.0-RC2 now, but lost the function of OLED and Joystick. We will work with the ELRS dev team and make the ELRS official firmware support the full function of the Micro TX Module. For the milestone, OLED will be supported in the V2.1 officially.
https://github.com/ExpressLRS/ExpressLRS
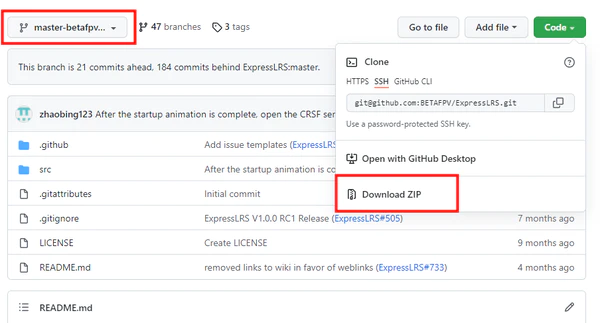
How do I set a binding phrase on this Micro TX module when the ELRS official mainstream does not support OLED yet?
First, download the source code of master-betafpv-oled-menu branch to local from Github.
Second, open the ExpressLRS Configurator and load the upzip source code from local. Select the target device “BETAFPV 900/2400 TX Micro”. Now, you could setup your own binding phrase and other options as normal.
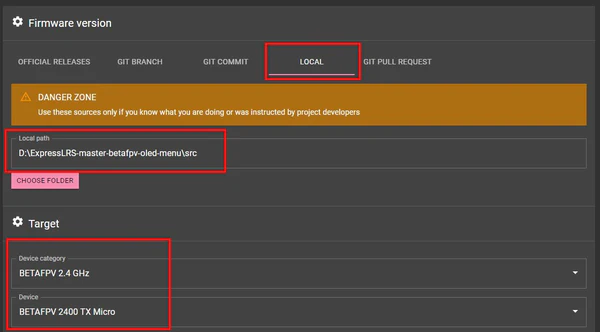
Third, build & flash.
Know More About ExpressLRS
ExpressLRS is an open-source RC link for RC applications.
ExpressLRS is based on Semtech Lora SX127x or SX1280 hardware for RX and TX respectively. it aims to achieve the best possible link performance in both speeds, latency, and range. At 900 MHz a maximum of 200 Hz packet rate is supported. At 2.4 GHz a blistering 500Hz is currently supported with a custom OpenTX build. This makes ExpressLRS one of the fastest RC links available while still offering long-range performance.
More and more vendors start to support the ExpressLRS radio protocol in different parts, like radio transmitter with ELRS in stock, drone with built-in ELRS receiver, ELRS TX module for JR bay, or Nano bay. BETAFPV team take part in this project and provide a series of ExpressLRS components.
Backpack Function
Some of the ExpressLRS TX modules include an additional ESP8285 chip, which lets us communicate wirelessly with other ESP8285 enabled devices using a protocol called espnow. We call this chip the “TX-Backpack”. The aim of the TX-Backpack is to allow wireless communication between ExpressLRS, and other FPV related devices for command and control, or for querying config.
https://github.com/ExpressLRS/Backpack/wiki
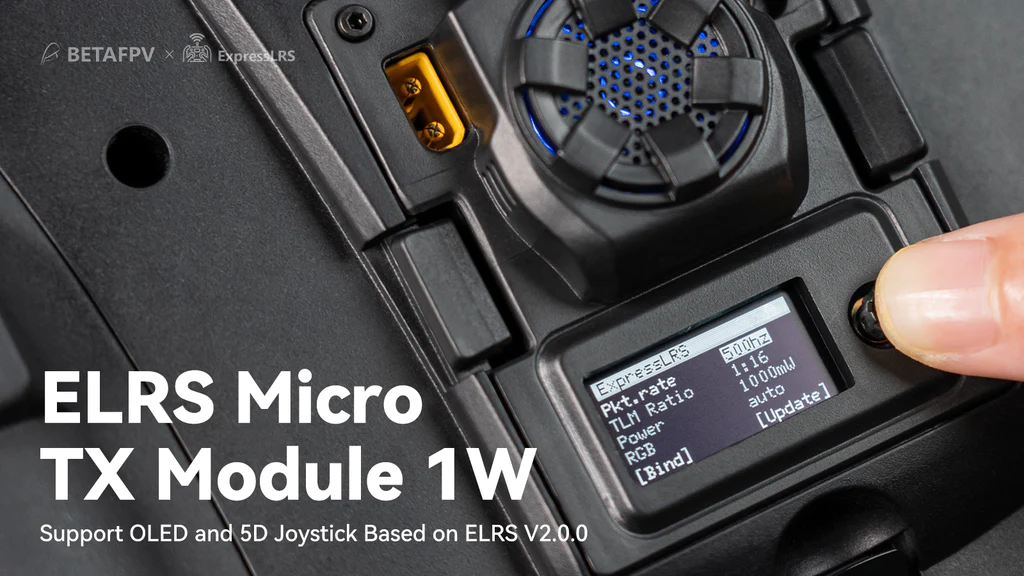
Button and OLED
The ELRS TX module could be configured via the OpenTX LUA script. With OLED and button, no-OpenTX radio controller that supports CRSF could use this ELRS Micro module easily. The following no-OpenTX radio controllers work well with this TX module. Futaba T16IZ, T16SZ and T18SZ (with update to 3.9e), Wsky ET16, Radiolink AT9S Pro.
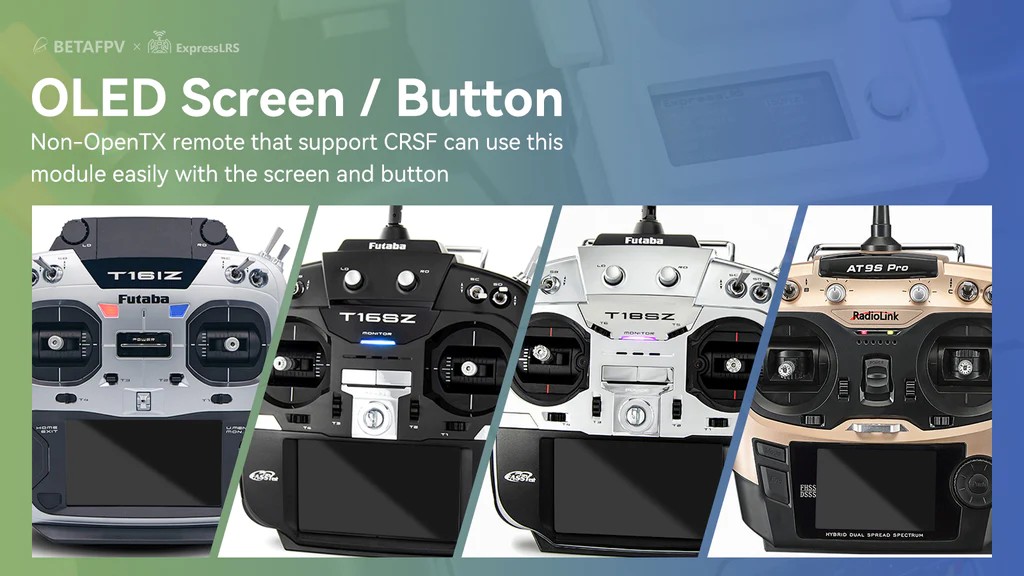
Note: All 5D button dimensions are available on BETAFPV ELRS V2.0.0 firmware. Please upgrade the firmware for new supports.
Below is the basic operation of the button and OLED for V1.0.0 firmware.
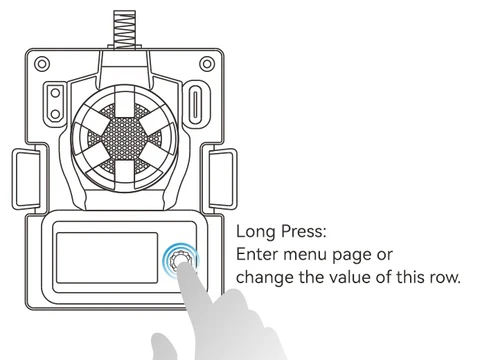
Long Press:
In the lock screen page, long press to unlock and enter the menu page.
In the menu page, long press to change the value of this row.
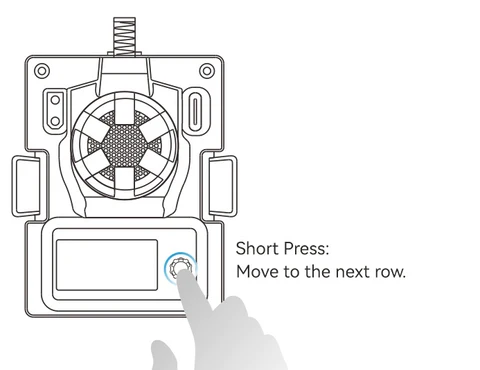
Short Press:
In the lock screen page, short press invalidly.
In the menu page, short press to move to the next row.
Note: When the RF TX module is entering menus page, the connection between RF TX module and receiver will be lost, the connection will recover after exiting menus page automatically; you must re-power the receiver if you have changed the Pkt Rate.
Note: When the RF TX module enters WIFI Upgrade status, the button will be invalid. Please re-power the RF TX module after firmware update via WIFI.
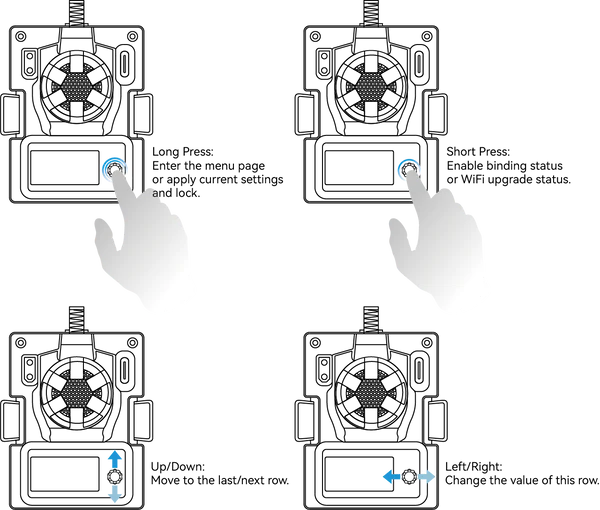
Below is the basic operation of the button and OLED for BETAFPV ELRS V2.0.0 firmware.
Long Press: Unlock and enter the menu page, or apply current settings in the menu page.
Up/Down: Move to the last/next row.
Left/Right: Change the value of this row.
Short Press: Enable binding status or WiFi upgrade status.
Note: You must re-power the receiver if you have changed the Pkt Rate.
Note: When the RF TX module enters WIFI Upgrade status, the button will be invalid. Please re-power the RF TX module after firmware update via WIFI.
Basic Configuration
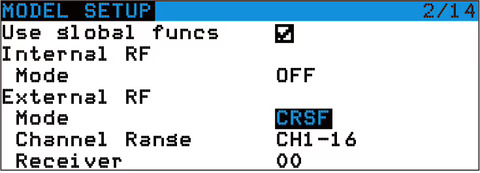
ExpressLRS uses the Crossfire serial protocol (AKA CRSF protocol) to communicate between the radio transmitter and the TX module. So make sure your radio transmitter supports the CRSF serial protocol. We use the radio transmitter with the OpenTX system to show how to set up the CRSF protocol and LUA script. To set this up, in the OpenTX system, enter into model settings, and on the “MODEL SETUP” tab, turn off the “Internal RF”. Next, enable “External RF” and select “CRSF” as the protocol.
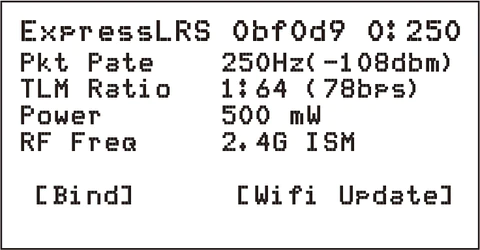
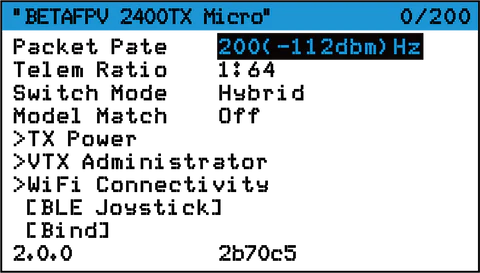
ExpressLRS use the OpenTX LUA script to control the TX module, like bind or setup. With the LUA script, pilots could check, and set up some configurations of the Nano RF TX module. For more details, please check the Support Page.
- Save the ELRS.lua/ELRSV2.lua script files onto the radio transmitter’s SD Card in the Scripts/Tools folder;
- Long press the “SYS” button (for RadioMaster T16 or similar radios) or the “Menu” button (for Frsky Taranis X9D or similar radios) to access the Tools Menu where you can find ELRS/ELRSV2.lua script ready to run with only one click;
- Below image shows the LUA script run successfully;
ELRS.lua script
ELRSV2.lua script
Bind & Output Power
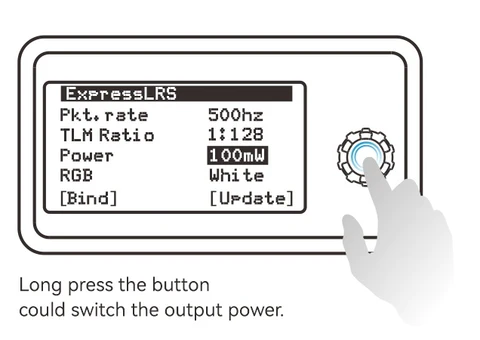
The Micro RF TX module comes with officially major release V1.1.0 or V2.0.0 protocol and no Binding Phrase included. So please make sure the receiver works on officially major release V1.0.0~V1.1.0 or V2.0.0 protocol. And no Binding Phrase set. Micro RF TX module could enter binding status via ELRS.lua or ELRSV2.lua script, as described in “LUA Script” chapter. Besides, using the button and OLED, move to the BIND position and long-press the button. Short press the button if it is V2.0.0. Then the RF module will enter binding status.
ELRS.lua script
Note: The LED will NOT flash when entering binding status. The module will exit from binding status 5 seconds later auto. Short and consecutive press 3 times to bind.
ELRSV2.lua script
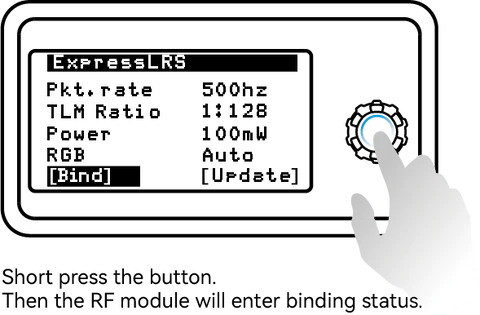
Note: The LED will NOT flash when entering binding status. The module will exit from binding status 5 seconds later automatically.
Note: If you reflash firmware of the RF TX module with your own Binding Phrase, please make sure the receiver has the same Binding Phrase. The RF TX module and the receiver will bind automatically in this situation.
Micro RF TX module could switch the output power via ELRS.lua or ELRSV2.lua script, as described in “LUA Script” chapter. Besides, using the button and OLED, move to the Output position. Switch the output power by long-pressing the button (ELRS.lua script). Pushing the button left or right (ELRSV2.lua script).
ELRS.lua script

Note: The RGB LED will NOT change according to the output power. When the output power is 250mW or above, the fan will spin automatically. The Micro RF TX module does NOT support 1W or 2W output. When switching to this value, the system will move to 500mW automatically.
ELRSV2.lua script
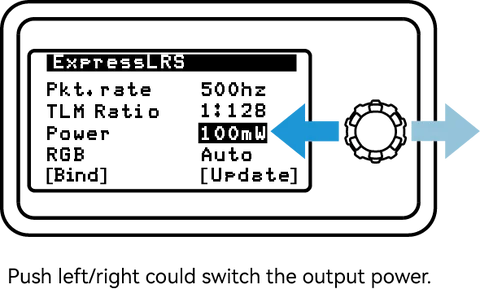
Note: The RGB LED will NOT change according to the output power. When the output power is threshold value(default 250mW) or above, the fan will spin automatically.
FAQ
BETAFPV ELRS Micro TX module user manual download.
Package
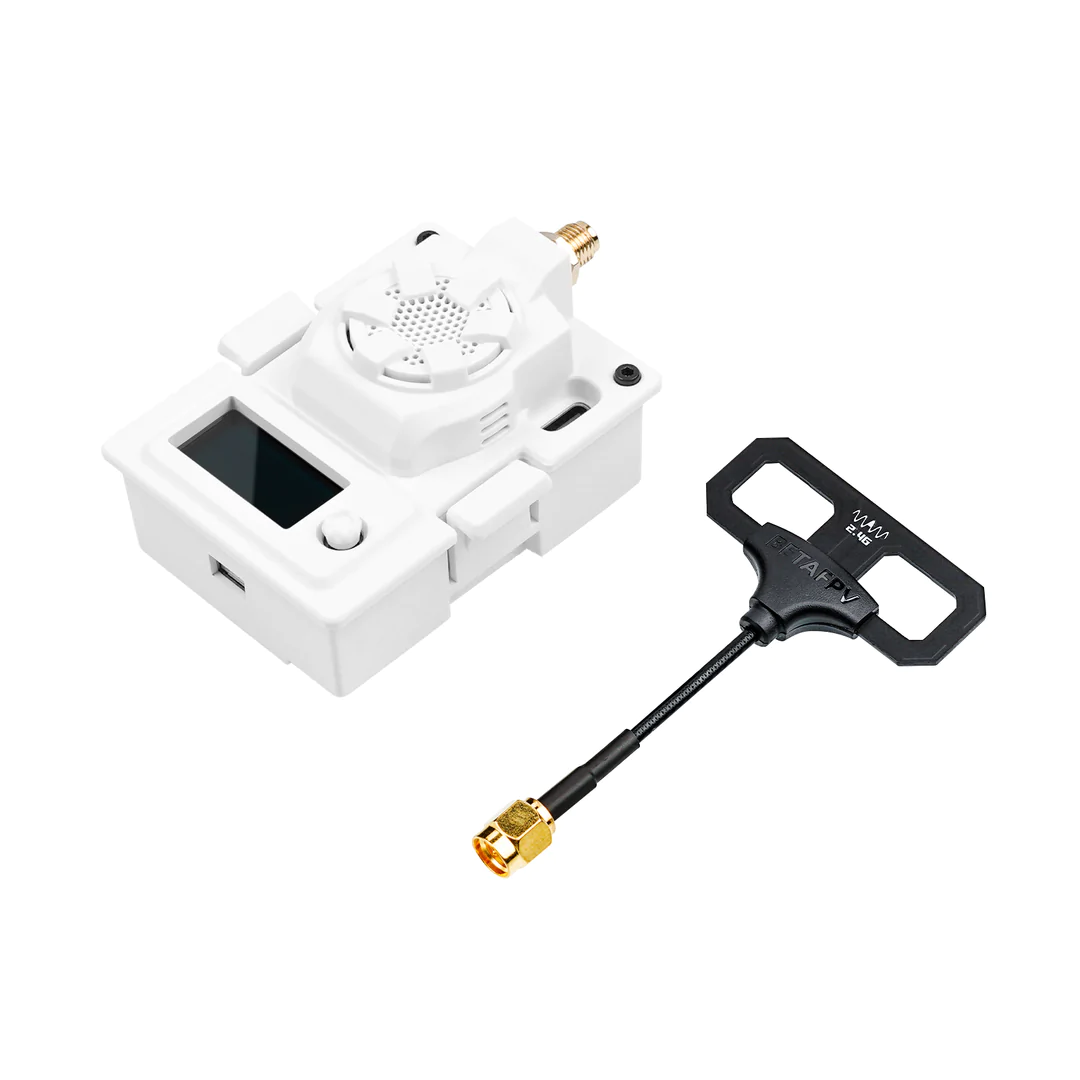
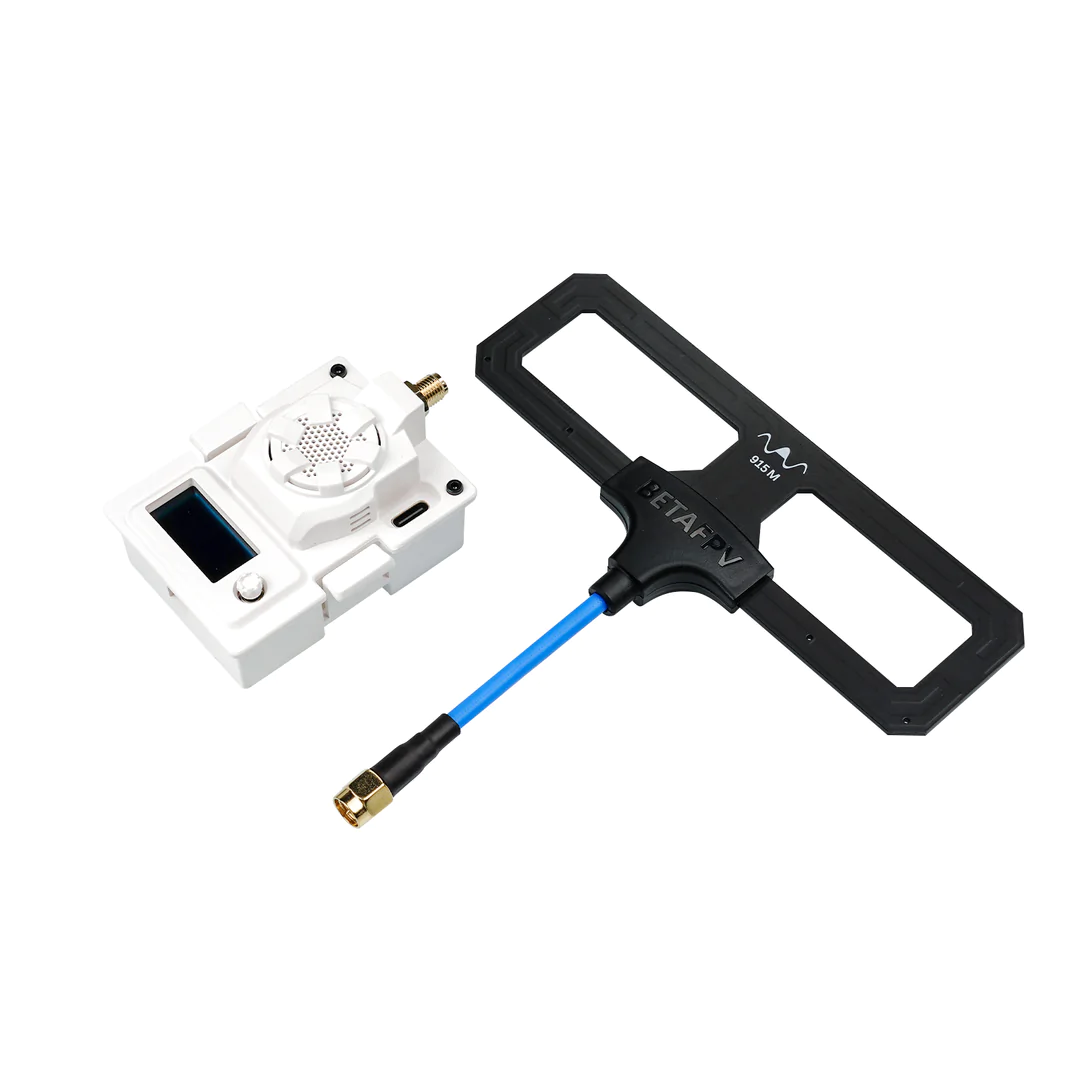
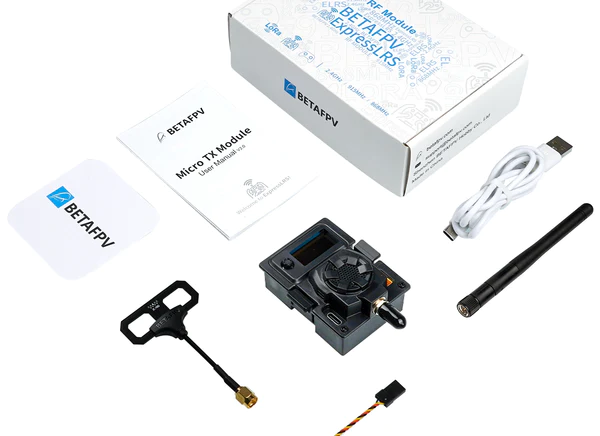
- 1 * BETAFPV ELRS Micro TX module
- 1 * BETAFPV Moxon antenna (2.4G, 915MHz or 868MHz)
- 1 * Monopole antenna
- 1 * Micro TX module user manual
- 1 * Spare USB data cable (Type-A to Type-C)
Note: ELRS Micro TX Module 915MHz or 868MHz version excludes the Monopole antenna. The Moxon antenna black or white will be shipped randomly.
| Weight | 0.3 kg |
|---|


